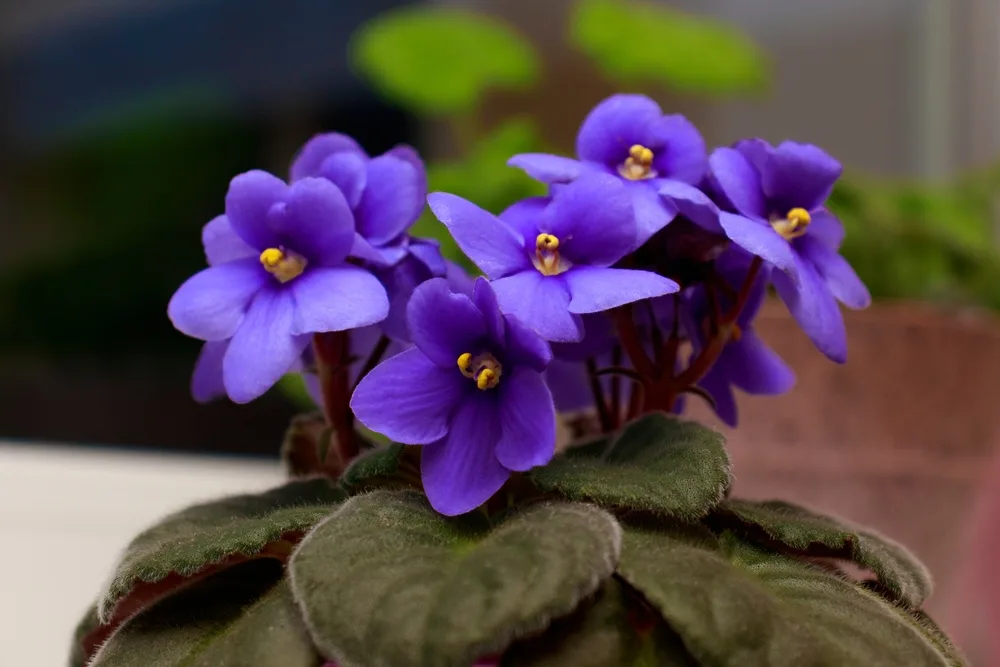
Repotting African violets regularly enhances their growth and flowering.
African violets, known scientifically as Saintpaulia ionantha, are enduring plants that can enrich indoor plant collections for as long as 50 years.
However, occasional repotting of African violets plays a crucial role in maintaining their health and promoting abundant blooms over time.
Indicators that your violets require repotting include stunted growth, diminished flowering, root-bound conditions, and drooping foliage.
The following vital guidelines for repotting African violets will assist you in accomplishing this task effectively, ensuring many more years of enjoyment with your plants.
11 Guidelines for Repotting African Violets

Repotting African violets rejuvenates their soil, prevents elongated stems, and stimulates flowering.
Additionally, it presents an opportunity to experiment with different pots and remove dead foliage to enhance the appearance of your plants.
1. Recognize the ideal time for repotting
African violets can be repotted at any point during the year, although it’s advisable to avoid repotting while plants are in bloom.
Most enthusiasts of African violets suggest repotting every six months. This is particularly beneficial if a plant has developed unattractive elongated stems, which can be rectified during repotting.
Repotting may also be necessary if plants are growing in excessively large pots, as oversized containers are prone to overwatering, leading to root rot.
2. Select the appropriate pot size
When repotting African violets, either reuse the existing pot or choose a new container. However, if your African violet requires a different-sized pot, opt for a vessel that is one size smaller or larger than the original pot. Plants with elongated stems often fit snugly back into their original pots, although you may need to trim some of their lower roots to ensure they sit lower in the pot with their leaves positioned just above the soil level.
3. Ensure adequate drainage
Whether you cultivate African violets in conventional pots or self-watering planters, ensure that the pot provides sufficient drainage holes.
The objective is to prevent waterlogged soil and facilitate the flushing of potting mix if salts and minerals accumulate.
While adding rocks and other materials to the bottom of pots does not improve drainage, you can create drainage holes (if necessary) using a power drill and a masonry drill bit.
4. Consider using an azalea pot
Although African violets can be grown in plastic, terra-cotta, or ceramic pots, utilizing azalea pots can further enhance their well-being.
Azalea pots are shallower than standard terra-cotta pots, perfectly accommodating the shallow root systems of African violets and reducing the risk of overwatering.
5. Sanitize old pots
Before repotting your African violet into a reused pot or planter, it’s advisable to sanitize the container.
Old pots may harbor harmful nematodes or bacteria that could impede the health and growth of your African violets. To sanitize old pots, immerse them in a 10% bleach solution for 30 minutes.
6. Choose high-quality potting mix.
When the time comes to repot your African violets, utilize fresh potting mix that promotes good drainage.
Many stores offer potting mixes specially formulated for African violets, although you can also create your own mix using coconut coir (or peat moss), vermiculite, and perlite.
A loose and well-draining potting mix is essential for the health of African violets, as these plants possess delicate roots that can be overwhelmed by heavy soil.
7. Handle with care

Extracting African violets from their original pots can be challenging, but exercising gentle handling is crucial to prevent stem and leaf breakage.
Attempt to invert the pot over your hand and gently shake the African violet free. If the plant remains lodged in the pot, moisten the soil slightly or delicately insert a pencil into the drainage hole and gently release the root ball.
8. Eliminate damaged leaves and spent flowers
Repotting presents an opportune moment to tidy up your African violets and remove dead flowers.
Utilize clean pruning shears or scissors to eliminate dead, damaged, or broken stems and leaves, as well as to deadhead faded blooms. This practice conserves energy for your plant and facilitates its adjustment following repotting.
9. Provide adequate hydration
Following repotting into a nutrient-rich, well-draining potting mix, offer your African violet a deep watering to aid its acclimatization.
Avoid fertilizing African violets for at least six weeks post-repotting, as most potting mixes contain added nutrients.
10. Enhance humidity levels
African violets may experience transplant shock after repotting, particularly if their roots were significantly disturbed or pruned during the process.
Minimize the risk of transplant shock by covering the newly repotted plant with a transparent plastic bag or humidity dome for one week.
This elevates humidity levels surrounding the plant, facilitating quicker acclimatization.
11. Experiment with propagation (optional)
Despite careful handling, stem or leaf breakage may occur during repotting. In such instances, do not discard the broken stems and leaves.
African violets can be easily propagated in both soil and water using healthy stem and leaf cuttings.
